Hey , Dummy Grow a Plant - Simple Soil Container Growing

Budzbuddha

Well-Known Member
IMG_5211.gif


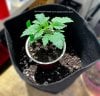
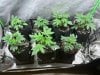
Container gardening involves growing plants in pots or containers rather than directly in the ground. For simple soil container growing, choose a well-draining potting mix, place it in containers with drainage holes, and select appropriate containers based on plant size. Ensure proper watering and sunlight for your specific plants, and consider using fertilizer as needed. Container gardening is versatile and suitable for various plants, making it accessible for both beginners and experienced gardeners.

This thread is for those looking for a simple , easy , no-frills method to container grows. No Bottles - No stupid cartoon nutes or BROSCIENCE.

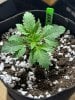
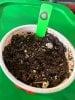
I run all of my “ soil “ grows using a layering method - nute dense medium at bottom / layered amendments and mild blend topsoil.
This method will work with Autoflowers or Photoperiods. The core of this is allowing base medium to feed plant without additional feed upfront.
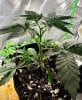
Plant will acclimate to base medium and feed according to its own needs , not by the heavy hand of the grower.

As the plant moves through its growth stages - simple “ recharging “ to base medium can be done by either top dressing ( fresh soil ) or dry fertilizer.

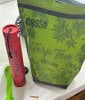
Fertilizer choices are many , however even simple general purpose 4-4-4 or 5-5-5 dry fertilizer will work. I will be using Roots Organic 2-part Grow and Bloom.
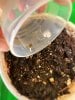
Base Medium -

Fox Farms Ocean Forest
Recipe 420 potting mix
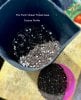
Amendment Layer :
Dynomyco or similar ( Mykos extreme / Myco Supreme / etc. ) an
Coarse perlite / pumice or rice hulls
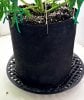
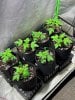
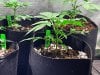
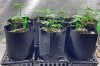
Containers :
Plastic / Bucket or Fabric Bags

Water :
Tap


This is a foolproof way to run a simple “ water only “ soil grow - No RO / Moose Sweat or Distilled. Tap water will work under most circumstances and does not require the “ 24 hour off gassing “ as those YouTube idiots suggest. Believe it or not , chlorine is a plant needed element. Typical city water sources are good enough to water your lawn , hydrate your dog and cook with. Calcium / Magnesium is present in this water and will eliminate the need to buy a bottle of Calmag . Dry fertilizer choice will also be a source of calcium and magnesium.

PH :
There will be little concern with ph (from most municipalities ) as soil will be prebuffered to control. As time moves on , recharging medium with fresh soil top dressing will also recharge buffering. By keeping this simple , you avoid running water stripped of these elements and looking to replace by means of Calmag bottles. Remember , it’s a plant , it doesn’t need “ special “ water.

NOTE : I have found that I can extend the longevity of the base soil’s PH by simply adjusting water to 6.5 . California water sources for me can run 7.6 or slightly higher out of tap. However , I can run it as-is and only adjust if water reads higher. I fill my water container and measure .

This will cover the most basic mix I use in most of my grows. I do experiment with other “ modded “ blends and will post some of those as time moves on.
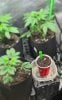
AUTOFLOWERS :
‘This will work exceptionally well for autoflowers as they do not require complicated feeds and are hardwired to harvest in a set amount of time. This method will carry a plant for weeks upfront ( strain dependent ). No sweetners or molasses will be used.

PHOTOPERIODS :
This method will also work for longer week grows. Recharging either with fresh soil - dry fertilizer or aerated soil tea bag ( more on that later ).
‘Plant will be recharged at intervals to keep medium nute dense , replacing only what the plant used . Technically, the plant will feed off of what it is accustomed to already - wasting money on multi bottle bullshit. There is absolutely zero reason to buy overpriced “ nutes “ made for cannabis …. You can feed it like a tomato plant .
I have run plants on Jobe spikes.

So feel free to share experiments , comments or ideas.
All is welcome.

Let’s Go :bigjoint:
 

Budzbuddha

Well-Known Member
Buddha Blend :

Soil :

Fox Farms Ocean Forest
Recipe 420 potting

Any good RTU ( ready to use ) soils available at retail / hydro stores or nursery , but check the ingredients listed on label.
Cheap soil will have lots of crappy fillers and subpar element sources , so use good soil from the start. Some peat based soils will need more amendments upfront , so is this why to keep things simple and direct , I will only use the soils listed.

Container :

94A5272D-1D77-4390-9EF5-580D05A26180.jpeg

Dealer’s choice :bigjoint:

Method will work on any size container or bag. 1/2/3/5 gallon .
Container volume size will also factor in on how long base medium will be feeding before recharging. I run 1 gallon SOG and 2-3 Gallon bags.
5 gallon buckets can run in the same manner.

Step 1 :

Add up to 1/3rd of container volume size of Ocean Forest - this layer of soil will be the most nute dense for plant. Ocean Forest is one of the most nute charged ready to use bagged soils out there. Although you can simply , run a full container of FFOF right out of the bag , some younger plants can be overwhelmed and show some nute burning. My method allows root mass to take advantage of the more mild mix above this layer .
Using your ready to transplant solo cup can give you an idea of base medium depth.

IMG_5218.jpeg

Step 2 :
Add coarse perlite / pumice or rice hulls. I chose to use #3 size perlite . I prefer this over the smaller standard and dustier size.
Mix throughly - break up clumps.

IMG_5217.jpeg

Step 3 :

Here is the magic layer . Add myco ( your brand choice ) - mist with water. You are jump starting the myco activity :weed:

Modifications :
Add Kelp Meal / DTE Biolive or Granular Humic Acid . This is used when I run long grow sativas ( autos or photo ) to supercharge .
Kelp ( liquid ) approximately a capful per gallon of water is another fantastic option done at intervals . Once a week paired with normal watering.
It works incredibly well during flower all without those stupid boosters and sweetners. Kelp is highly concentrated in growth hormones and micronutrients.

6079D790-2888-4B44-981F-20E171BEEA37.jpeg
 

Budzbuddha

Well-Known Member
Step 4:

Add transplant plug and sit it on moistened layer. Add your mild potting mix ( Recipe 420 or similar ) to fill.
Mist it as you fill - Do not saturate. You want some moisture to be buried within to help settle the medium and reduce shock.
You can add additional myco around plug if desired. Add in perlite as you fill up container.

Leave an inch or two of clearance - this is where you will add new soil ( top dressing ) or dry fertilizer. The beauty of this pocket is you can even mix in dry fertilizer with the fresh soil topdress for even better feeding. For example : ( 3 gallon bag ) - I add 1 to 2 tablespoons of Roots Organic Grow to a few cups of new soil ( mixing it thoughly ) - add it on top soil / water in.

Pretty god damn simple - right ?

IMG_3551.jpeg
 

Budzbuddha

Well-Known Member
After containers are filled , I water it very sparingly. The idea is to allow roots to move thru new home and seek the moisture.
You will never have to water to runoff ….. IF you follow this method as stated. Your container mix will be a thriving living soil and there is no need to crash it with outside nutrients / bottles or magic dust. No Flushing if you follow this as well.

Flushing is a failsafe for those growers that overfeed - that’s it. It is from a growers screwup with overfeeding and overwatering.
It does not Remove anything from plant , it merely resets the medium / removing the excess salt from overfeeding.

This plant is in week 2-3 of flower - notice the bag and very little salt buildup.

IMG_5221.jpeg

I don’t water to Runoff , I water enough to keep this peat mix hydrated , the fabric felt bags aerate thru the sides and allows oxygenation and good dry back. Peat based mixes can get hydrophobic and not absorb well at times but slow even watering can solve the issue. You can also add a wetting agent ( aloe / yucca ) to help also.

I use risers on all containers - it helps eleviate soggy container bottoms :bigjoint:
No water logging bottom roots or cold floors.


Follow the way of Buddha and you will get high :bigjoint:

IMG_2214.gif


Here are my plants using this basic mix.


IMG_5223.jpeg
They were foliar sprayed with a dilute mix of Armor SI to help toughen them up and resist transplant shock.


Stay Tuned :mrgreen:
 

tree beard

Well-Known Member
I love the simple soil method. Budz, what would you suggest if you HAVE to use ro water? My well water is absolutely horrifying, so I use ro.
 

Budzbuddha

Well-Known Member
IMG_3616.jpeg

Topping Day : Topped them all today - growth is noticeable with some bigger leaf showing.

IMG_3614.jpegIMG_3615.jpeg

Remember to let the medium do the feeding - plant will use what it wants / when it wants all without grower dumping shit down its throat.

For those still on the fence about Tap water being used - it is all i use. And pee of course :bigjoint: ( sorry wrong thread )
 

Budzbuddha

Well-Known Member
Solo Cup Containers :

This will be a brief example of solo cup containers for germination. I will post more examples later on in thread as i move grows around. But a no nonsense way to get shit started

1. Solo cup - Any brand / Any Size . I dont use clear or tinted variations of solo cups. Some growers use them as a “ inner “ cup to the regular red solo. Whatever floats your boat :bigjoint:

2. Soil : I reuse soil from my harvest containers. I dont get a lot left from them but for a few cups it works. Used soil will be somewhat milder to its original mix - perfect for germination. I do not add any nutes to it only myco. I pre dampen prior to planting seed.

Any light soil / mild potting mix will work also if you have already. Light warrior comes to mind.

3. Seed : As you can see , i merely presoak seeds in water - taproot pops and its off to the races. Some growers have their preferred method of germination- paper towel / rooters or direct to soil. I merely dig a small cavity and literally pour it in.

Strain shown ( “ O “ ) is a Deep Chunk cross i messed around with and like the smoke.


IMG_3621.jpegIMG_3625.jpegIMG_3624.jpegIMG_3623.jpeg

As this thread gains some traction- i will post some “ layered “ approaches to solo cups - even some variations for those that like to run solo cup competitions.

Stay Tuned.
 
Top